Picture this: your dream kitchen extension is finally underway. The new walls are up, and you can almost smell the coffee brewing on your future island. But the reality is a fine layer of dust coating everything, the kettle is balanced on a box in the hallway, and the noise starts promptly at 8 AM. This is the central challenge of "renovating while living in your home" balancing the excitement of transformation with the daily disruption.
The prospect of a live-in renovation can feel overwhelming. Homeowners often underestimate the impact of constant noise, mess, and lack of private space, which can strain family life and test patience. The key to not just surviving but thriving during this period is not luck; it's meticulous planning, clear communication, and a strategic approach to managing your space.
This guide is designed to provide you with a practical framework for navigating your home improvement project. We'll move beyond the theoretical and give you actionable steps to maintain your sanity and keep your project on track.
In this article, you'll learn:
- How to create a detailed master plan to minimise surprises.
- The non-negotiable importance of setting up a "sanctuary zone."
- Practical strategies for managing daily tasks like cooking and cleaning.
- How to communicate effectively with your contractors for a smoother process.
What Does a "Live-In Renovation" Really Entail?
A live-in renovation involves residing in your property while significant construction work is being carried out. This can range from a single-room remodel, like a bathroom, to a major extension or whole-house refurbishment. The primary motivation is often financial, but it demands a clear understanding of the trade-offs between cost savings and lifestyle disruption.
The Financial Benefits vs. The Lifestyle Costs
The most significant advantage of staying put is cost savings. By not paying for a short-term rental, which can cost thousands per month, you can allocate more of your budget to the renovation itself. According to a recent UK analysis, this trade-off is a major consideration for many families, who weigh the savings against the practical challenges. However, this financial gain comes at a lifestyle cost. You must be prepared for:
- Constant Presence of Tradespeople: Your home is their workplace.
- Loss of Functionality: You may be without a kitchen or main bathroom for weeks.
- Emotional Strain: The ongoing mess and decision-making can be mentally taxing.
Common Challenges: Dust, Noise, and Lack of Privacy
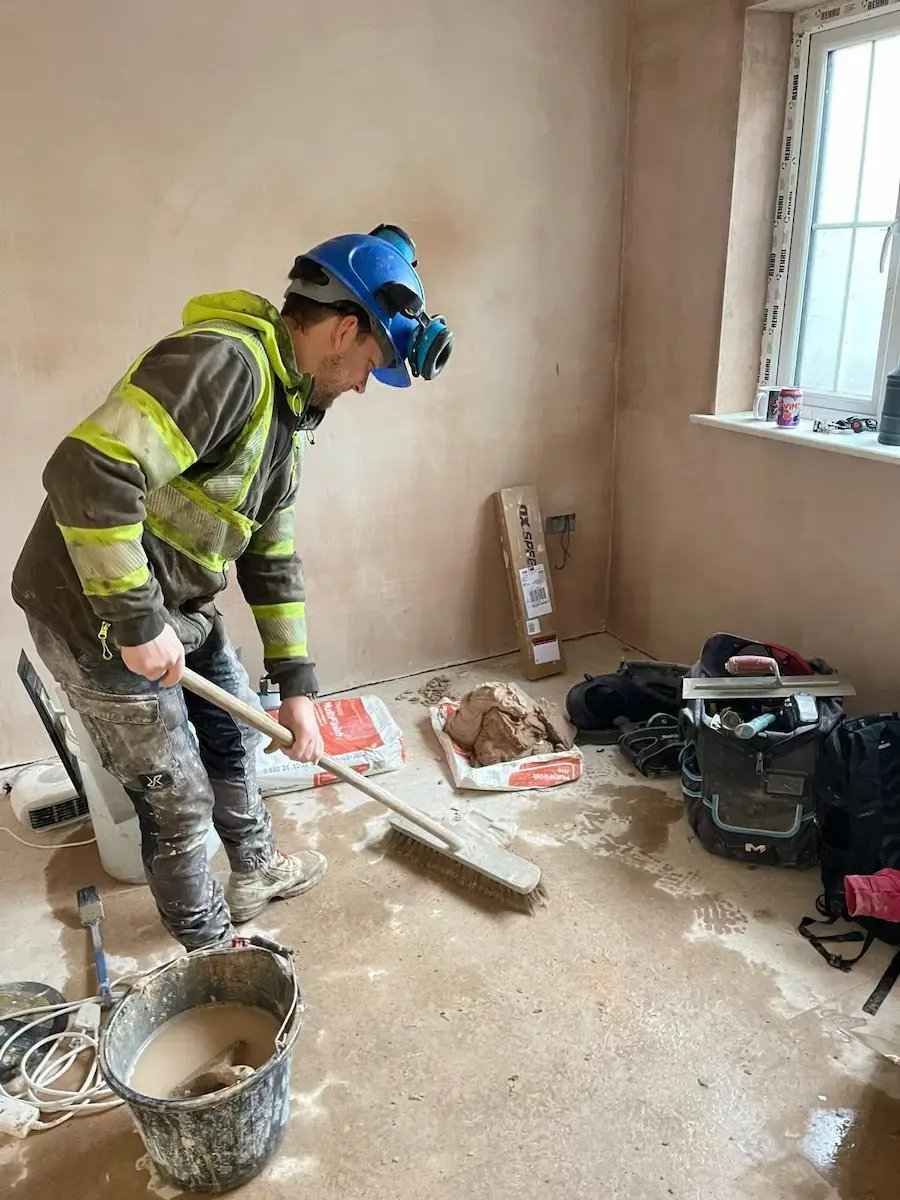
The three biggest hurdles of any live-in renovation are universal: dust, noise, and a complete lack of privacy. Dust from demolition and drywall sanding is pervasive and can get into everything, even in rooms far from the work zone. Noise from power tools can make working from home or relaxing impossible. Finally, having workers in your personal space from early morning until evening erodes your sense of sanctuary.
To mitigate these, you must plan for:
- Containment: Using plastic sheeting, zip doors, and air scrubbers.
- Scheduling: Agreeing on working hours with your contractor (e.g., no loud work before 9 AM).
- Personal Space: Clearly defining off-limits areas for the construction crew.
Setting Realistic Expectations for Your Project Timeline
One of the fastest routes to renovation frustration is an unrealistic timeline. Delays are almost inevitable due to unforeseen issues, material delivery problems, or weather. It is crucial to have an open conversation with your contractor about a realistic schedule, including a buffer for potential setbacks. A 4-week project can easily become a 6-week project. Accepting this possibility from the outset helps manage stress and allows you to plan your life with more flexibility.
How Do You Create a Master Plan for Renovating While Living in Your Home?
Creating a master plan is the single most effective way to minimise renovation disruption. This plan should be a detailed, written document that serves as a roadmap for you and your contractor, covering everything from the project phases to contingency funds. It transforms a chaotic process into a series of manageable steps.
Phase 1: The Non-Negotiable Planning Stage
Before a single hammer is swung, your planning phase should be 100% complete. This means all designs are finalised, materials are selected, and major fixtures are ordered. Last-minute changes are a primary cause of delays and budget overruns. Your planning checklist should include:
- Final Architectural Drawings: Signed off and approved.
- Structural Engineer Reports: Completed if required.
- Planning Permissions: Secured from the local council (e.g., Ribble Valley Borough Council).
- Material and Finishes Selection: Tiles, flooring, paint colours, and fixtures chosen.
- Contractor Agreement: A detailed contract signed, outlining scope, payment schedule, and timeline.
Breaking Down Your Project into Manageable Phases
For larger projects, a phased approach can make renovating while living in your home far more tolerable. Instead of disrupting the entire house at once, you complete the project in sequential stages. For example, if you are renovating two bathrooms and a kitchen, you might phase it as follows:
- Phase 1: Complete the secondary bathroom (ensuring you always have one functional bathroom).
- Phase 2: Renovate the main bathroom.
- Phase 3: Tackle the kitchen renovation.
This approach prolongs the overall project duration but significantly reduces daily disruption, making it a popular strategy for families.
Creating a Detailed Schedule with Your Contractor
Work with your contractor to develop a detailed project schedule (a Gantt chart is ideal). This timeline should outline every major task, its duration, and its dependencies. Ask for key milestones, such as:
- When will demolition start and end?
- When will plumbing and electrical rough-ins occur?
- When does plastering begin (the messiest phase)?
- When will you lose access to critical rooms like the kitchen?
Budgeting for Contingencies and Temporary Living Costs
Your budget must include a contingency fund of 10-15% of the total project cost. This covers unexpected issues, such as discovering damp behind a wall or needing to upgrade your electrical panel. Additionally, budget for the hidden costs of a live-in renovation:
- Increased Takeaway Meals: When your kitchen is out of commission.
- Laundrette Costs: If your laundry room is inaccessible.
- Temporary Storage Unit: To protect furniture from dust and damage.
- Air Purifiers or Filters: To manage dust and maintain air quality.

Why is a "Sanctuary Zone" Your Most Important Asset?
A "sanctuary zone" is a designated area of your home that is completely sealed off from the renovation. This dust-free, quiet space is non-negotiable for maintaining your sanity; it provides a clean, calm retreat from the chaos of the construction zone. It's where you can relax, eat, and sleep without feeling like you're on a building site.
Defining and Protecting Your Renovation-Free Space
Choose a room (or rooms) furthest from the primary work area, often a master bedroom and a living room. Communicate its boundaries clearly to your construction crew. Use the following methods to protect it:
- Seal Doorways: Use heavy-duty plastic sheeting and a dust barrier system like 'ZipWall' (£150-£200 for a starter kit), which creates a tight seal but allows access via a zippered door.
- Protect Flooring: Lay down protective coverings on floors leading to the sanctuary zone.
- Separate Ventilation: Close air vents in the sanctuary zone to prevent dust from travelling through the HVAC system.
Setting Up a Functional Temporary Kitchen
Losing your kitchen is one of the biggest disruptions. A well-equipped temporary kitchen is essential for live-in renovation survival. Set it up in your sanctuary zone or another clean area. Key components include:
- A Countertop Surface: Use a folding table or repurposed desk.
- Small Appliances: A microwave, kettle, toaster, slow cooker, and a portable 'induction hob' (£50-£100) are invaluable.
- A Mini-Fridge: For essentials like milk, butter, and perishables.
- Water Access: If possible, set up near a utility sink or bathroom. Otherwise, use large water dispensers.
- Washing Up Station: A simple basin, washing up liquid, and a drying rack.
Protecting Your Belongings from Dust and Damage
Construction dust is incredibly fine and will infiltrate unprotected furniture and electronics. Pack away everything you can. For items that must remain, take these precautions:
- Move Furniture: Relocate furniture from the work zone to another room or a storage unit.
- Cover Everything: For furniture remaining in adjacent rooms, cover it with heavy-duty plastic sheets, taped down securely.
- Empty Cupboards: Pack away the contents of any cupboards in or near the renovation area.
- Seal Closets: Use masking tape to seal the gaps around closet doors to protect clothes.

Managing Daily Life Amidst the Chaos
Successfully navigating a live-in renovation requires adapting your daily routines. Flexibility and preparation are key to minimising the impact on your family's comfort and well-being. By anticipating challenges and creating new systems, you can maintain a sense of normalcy even when your home is in disarray.
Daily Routines: Adapting Your Schedule for a Live-in Renovation Survival
Your normal schedule will inevitably be disrupted. Proactively adjust it to work with the construction schedule, not against it.
- Morning Routine: Plan to be up and ready before the crew arrives, typically around 8 AM. This avoids awkward encounters and ensures you have bathroom access.
- Meal Planning: Simplify your meals. Rely on one-pot recipes using a slow cooker, microwave meals, or pre-prepared salads. Plan for a takeaway night once or twice a week as a treat.
- Cleaning System: Dedicate 15 minutes every evening to clean up. This involves vacuuming dust that has migrated, wiping down surfaces in your sanctuary zone, and generally tidying up to feel more in control.
Keeping Children and Pets Safe on a Construction Site
A renovation zone is a hazardous area. It is your responsibility to ensure the safety of your children and pets. Establish strict rules and physical barriers.
For Children:
- Clearly explain which areas are off-limits.
- Use safety gates to block access to the work zone.
- Ensure they understand the dangers of tools, dust, and debris.
For Pets:
- Keep them secured in your sanctuary zone or a separate safe room during working hours.
- Be mindful of open doors and windows; ensure they cannot escape.
- The constant noise can be stressful for animals, so provide a quiet, comfortable space for them.
Health and Safety: Dust Control and Ventilation
Construction dust can contain harmful particles. Protecting your family's respiratory health is a top priority. Your contractor should be using dust extraction on their tools, but you should also take extra steps:
- Invest in an Air Purifier: Use a model with a HEPA filter in your sanctuary zone, especially in bedrooms, to capture fine dust particles.
- Ventilate: When weather permits, open windows in non-work areas to improve air circulation.
- Change HVAC Filters: If you have a central air system, change the filters frequently during and after the project.
Effective Communication: The Key to a Stress-Free Project
Clear, consistent, and documented communication with your contractor is the bedrock of a successful renovation. Misunderstandings about expectations, timelines, or costs are the primary source of conflict. Establishing a robust communication framework from the outset will save you time, money, and stress during the process of renovating while living in your home.
Establishing Clear Communication Channels with Your Contractor
Before the project starts, agree on the primary methods and frequency of communication. Don't rely on casual chats as workers are coming and going. Formalise the process.
- Designated Contact Person: Identify one point of contact on the contractor's team (usually the project manager or site foreman) for all your queries.
- Preferred Method: Decide if you will communicate via a dedicated WhatsApp group, email, or a project management app. An email trail is excellent for documenting important decisions.
- Response Times: Agree on reasonable response times for non-urgent questions (e.g., within 24 hours).
The Importance of Regular Site Meetings
Schedule a brief, standing meeting once or twice a week. This is a dedicated time to walk through the site with the project manager, review progress against the schedule, and address any issues that have arisen. This proactive approach prevents small problems from escalating. Prepare an agenda for each meeting to keep it focused:
- Review of work completed in the past week.
- Plan for the upcoming week.
- Discussion of any decisions you need to make (e.g., confirming tile layout).
- Addressing any concerns or questions.
Using Technology to Stay Organised
Leverage simple technology to keep everyone on the same page. This is particularly useful for documenting progress and decisions.
- Shared Photo Albums: A shared album (e.g., Google Photos, iCloud) is perfect for progress photos and visually highlighting issues or questions.
- Digital Documents: Keep all documents, contracts, change orders, and receipts in a shared cloud folder like Dropbox or Google Drive.
- Shared Calendars: Use a shared digital calendar to track key milestones, payment due dates, and scheduled meetings.
What to Do When Things Go Wrong: A Problem-Solving Framework
Even with the best planning, issues will arise. Address them promptly and professionally.
- Document the Issue: Take photos and write a clear, concise email to your project manager explaining the problem.
- Refer to the Contract: Check your contract to see how such issues are meant to be handled.
- Discuss Solutions, Not Blame: Approach the conversation with a collaborative mindset. Ask, "How can we resolve this?" rather than assigning blame.
- Get it in Writing: Once a solution is agreed upon, document it in a follow-up email or a formal change order to prevent future disputes.
Essential Tools and Supplies for a Live-In Renovation
Being well-equipped with the right tools and supplies can make a significant difference in your comfort and ability to cope with a live-in renovation. Think of it as creating a homeowner's survival kit. These items help you manage the practical day-to-day challenges of dust, cooking, and noise, turning a stressful situation into a more manageable one.
The Homeowner's Survival Kit
Assemble a box of essentials that you can access easily. This kit should focus on cleaning, basic repairs, and personal comfort.
- Cleaning Supplies: A good quality vacuum with a HEPA filter, microfiber cloths, all-purpose cleaner, and plenty of bin bags.
- Dust Sheets and Tape: Extra plastic sheets and masking tape for covering items or sealing doors unexpectedly.
- Basic Toolkit: A utility knife, screwdriver set, and torch will come in handy more often than you think.
- First-Aid Kit: Ensure it's well-stocked, especially with plasters and antiseptic wipes.
- Power Bank: To keep your phone charged when access to outlets is limited.
Dust Containment Systems You Need to Know About
While your contractor should manage primary dust control, supplementing their efforts will protect your home and health. Ask your contractor what systems they use and consider investing in your own.
- Dust Barrier Doors: Systems like the 'ZipWall Magnetic Dust Barrier Door Kit' (around £80-£120) are invaluable. They attach to plastic sheeting and provide a self-closing entry, making it easy to move between zones while keeping dust contained.
- HEPA Air Scrubber: For major renovations or those with respiratory sensitivities, renting or buying a portable air scrubber can dramatically improve indoor air quality by capturing airborne dust particles.
Temporary Appliances That Make a Difference
Your temporary kitchen's functionality hinges on a few key appliances. Choose versatile, compact items that are easy to set up and store.
- Portable Induction Hob: Safer and more efficient than traditional hot plates.
- Multi-Cooker/Slow Cooker: Ideal for one-pot meals with minimal effort.
- Air Fryer: A versatile tool for quickly cooking everything from vegetables to chicken without needing a full oven.
- Electric Kettle: Essential for tea, coffee, and instant meals.
Investing in Noise-Cancelling Headphones and White Noise Machines
Do not underestimate the psychological impact of constant, intrusive noise. Power saws, hammering, and radios can make it impossible to concentrate, relax, or sleep. Investing in noise control is an investment in your well-being.
- Noise-Cancelling Headphones: A quality pair (e.g., from 'Bose' or 'Sony') is essential if you work from home or are sensitive to noise.
- White Noise Machines: Use these in bedrooms at night to drown out unexpected or late-running construction sounds, ensuring you get a restful sleep.
Maintaining Your Sanity and Relationships
Surviving the process of renovating while living in your home is as much a psychological challenge as it is a practical one. The sustained stress, disruption, and endless decision-making can take a toll on you, your family, and even your relationship with your neighbours. Proactively managing this emotional side of the renovation is just as important as managing the budget and schedule.
Acknowledging the Stress Factor of Home Renovations
First and foremost, acknowledge that this will be a stressful period. It's normal to feel overwhelmed, frustrated, and tired of the mess. Giving yourself and your family permission to feel this way can prevent resentment from building up. Set realistic expectations that not every day will be smooth. Focus on the fact that the disruption is temporary and has a clear end goal. Communication within the family is key; hold regular check-ins to see how everyone is coping.

Planning "Escape" Days and Renovation-Free Weekends
You must plan regular escapes from the renovation zone. Your home is no longer a place of rest, so you need to find alternatives.
- Schedule Weekly Outings: Plan at least one day each weekend to get out of the house completely. Go for a walk in the beautiful Ribble Valley, visit family, or spend the day in a nearby town.
- Utilise Evenings: Don't feel you have to be home every evening. Go out for a simple dinner or to the cinema to give yourself a mental break.
- Protect Your Weekends: If possible, agree with your contractor that weekends are work-free days. This guarantees you two days of relative peace and quiet to recharge.
How to Keep Your Neighbours Happy During Construction
A major renovation can be disruptive for your neighbours too, with noise, extra vehicles, and potential mess. Maintaining a good relationship is important.
- Give Them a Heads-Up: Before work begins, speak to your immediate neighbours. Explain the scope of the project and the expected timeline.
- Share Contact Information: Give them the contact number for your site foreman so they can report any immediate issues (like blocked access) directly.
- Manage Parking and Debris: Ensure your contractors are considerate about parking and keep the pavement and shared areas clean and tidy at the end of each day.
- A Small Gesture: A small gift or thank you card at the end of the project can go a long way.
Focusing on the End Goal: Your Finished Space
On the toughest days, when the dust and noise feel endless, remind yourself why you started this project. Keep visuals of the finished space readily available, whether it's a mood board, architectural drawings, or 3D renders. Celebrate small milestones along the way, like the completion of demolition or the successful plastering of the walls. These small victories help maintain momentum and keep your eyes on the beautiful, functional home you are creating.
Conclusion: Your Blueprint for a Successful Live-In Renovation
Embarking on a renovation while living in your home is a significant undertaking, blending the excitement of creating your dream space with the undeniable stress of living on a construction site. However, as we've explored, the disruption can be successfully managed with a robust strategy built on meticulous planning, clear communication, and a commitment to protecting your well-being. By turning your home into a well-managed project, you can navigate the process with confidence and emerge with a space you love, without sacrificing your sanity.
Key Takeaways:
- Planning is Paramount: The success of your live-in renovation is determined long before demolition begins. A detailed plan, finalised designs, and a realistic schedule are your most powerful tools for minimising disruption and staying on budget.
- The Sanctuary Zone is Non-Negotiable: Creating a clean, dust-free, and functional area that is off-limits to construction is essential for your mental and physical health. This retreat provides the necessary space to recharge amidst the chaos.
- Communication Prevents Conflict: Establish clear and regular communication channels with your contractor. Weekly meetings and documented decisions prevent misunderstandings and ensure everyone remains aligned, which is crucial for renovating while living in your home.
- Prioritise Well-being: Actively manage the stress of the renovation by planning escapes, controlling dust and noise, and ensuring the safety of your family. Remember that this is a temporary phase with a valuable long-term reward.
If you are planning a renovation in Clitheroe or the surrounding Lancashire area, our team at D Blackburn Contractors has extensive experience in managing projects to minimise disruption for homeowners. Contact us today for a consultation to discuss how we can help you transform your home smoothly and efficiently.